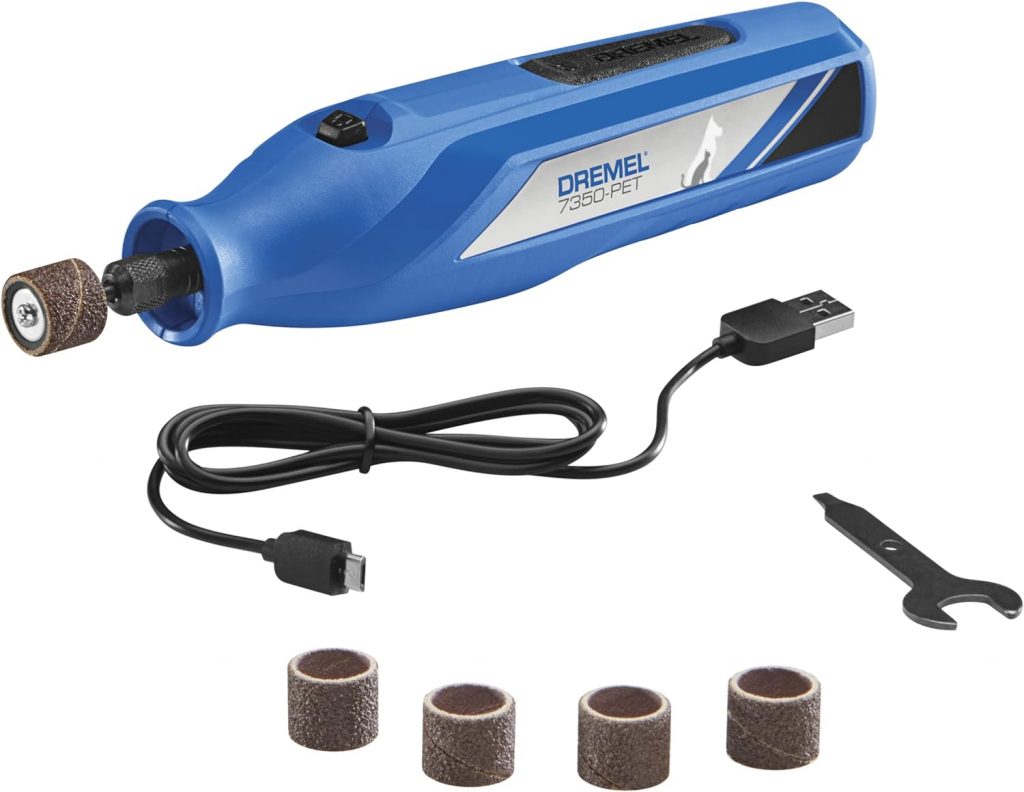
Trimming Nails with a Grinder
Trimming your dog’s nails can be a daunting task, especially if your furry friend is apprehensive or has dark, hard-to-see quicks. However, there’s a tool that can make the process more manageable and less stressful for both you and your pet: a Dremel or other grinder. In this blog, we’ll explore the benefits of using a ginder for nail trimming, provide step-by-step instructions, and offer tips to ensure a safe and comfortable experience for your canine companion.
Why Use a Grinder for Nail Trimming?
- Precision: A grinder allows for precise nail shaping, reducing the risk of cutting into the quick.
- Smoother Edges: Unlike traditional clippers, which may leave sharp edges, a grinder smooths the nail’s surface for a more comfortable experience.
- Reduced Risk of Bleeding: When used correctly, a grinder greatly minimizes the risk of cutting the quick, which can cause bleeding and pain.
- Less Stress: Many dogs find the vibrations and noise of a grinder less intimidating than the pressure of nail clippers.
Trimming the Dog’s Nails
- Gather Your Supplies:
- A grinder with a sanding drum attachment designed for pet nail trimming.
- A well-lit, quiet and comfortable workspace.
- Treats for positive reinforcement.
- A mask, the grinder can raise a lot of dust.
- Prepare Your Dog: Start by acclimating your dog to the grinder. Turn it on and let your dog investigate the sound and vibrations while giving treats and praise. Make this a positive experience.
- Choose the Right Speed: Most grinders have variable speed settings. Begin with a low speed and gradually increase it as your dog becomes more comfortable.
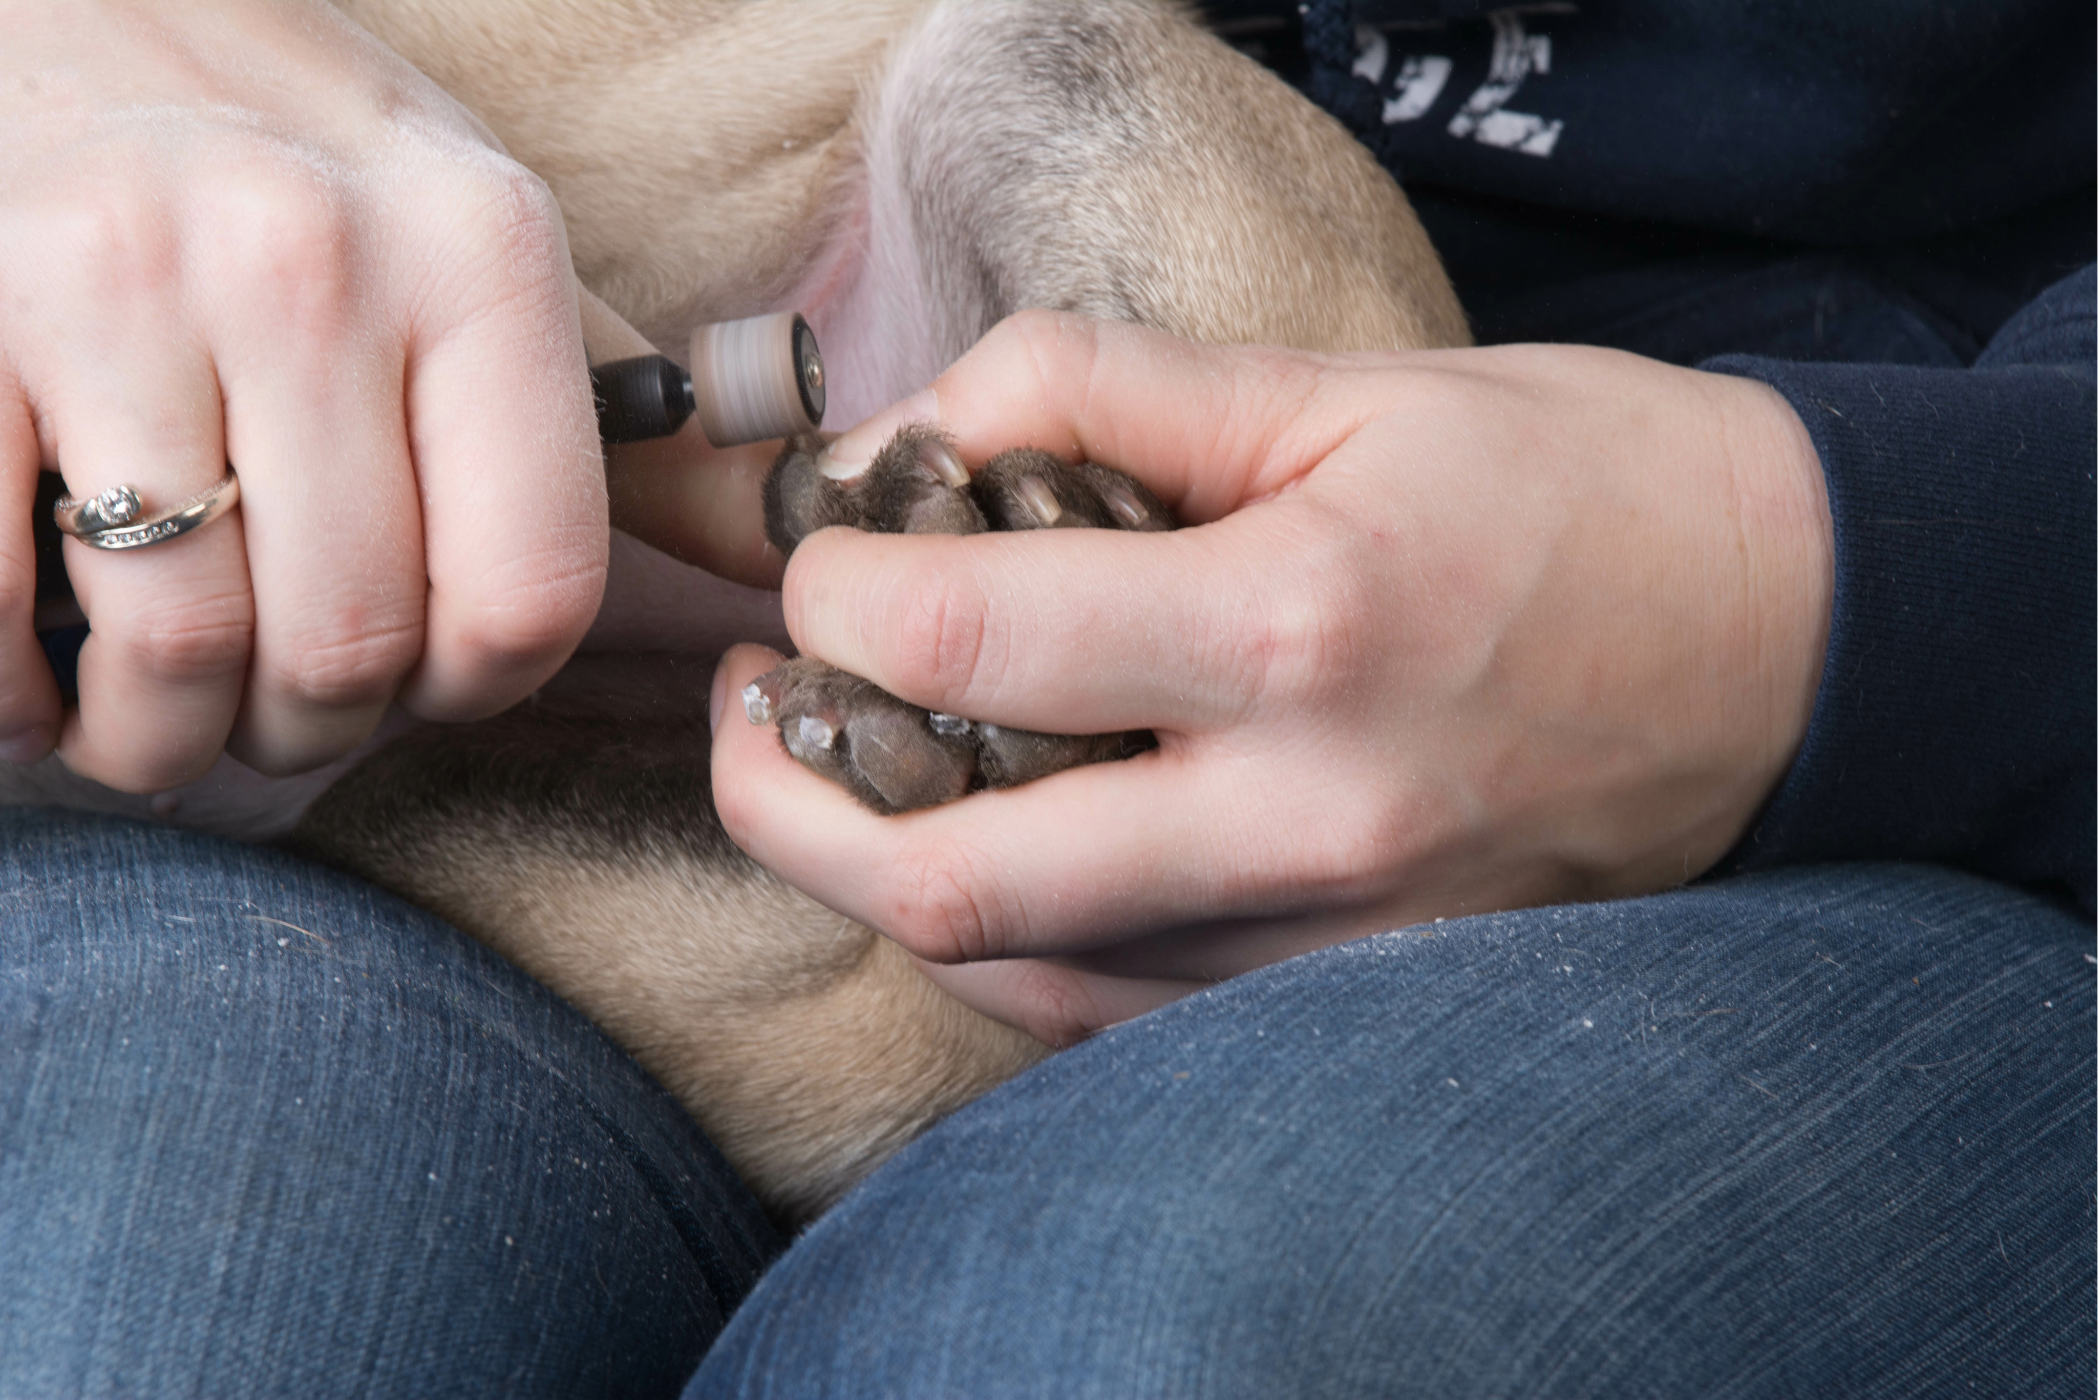
- Handle Your Dog’s Paw: Gently hold your dog’s paw, and use your thumb to press the pad to extend the nail. Be careful not to press too hard or squeeze the paw.
- Begin Sanding: Carefully approach the nail with the sanding drum. Start by rounding the sharp edges, working your way up to the quick. Never sand more than a few seconds to avoid overheating the nail. Instead, go over each nail and then go back and go over them again. Repeat as many times as needed.
- Monitor the Progress: As you sand, periodically check the nail’s tip to ensure you’re not getting too close to the quick. The quick is typically a pinkish color, while the outer nail is whitish.
- Use Treats and Praise: Reward your dog with treats and praise throughout the process. This positive reinforcement helps your dog associate nail trimming with good experiences. Use a different treat (like a small piece of cheese) that is not used for other occasions to make it more special.
- Gradual Trimming: If your dog has very long nails, don’t try to trim them all in one session. Make multiple shorter sessions over a few days or weeks until you reach the desired length.
- Finish with a Smooth Edge: After trimming, use the grinder to smooth the nail’s edges, creating a comfortable, rounded shape.
- Clean the Grinder: After each use, clean the grinder to remove any nail dust and maintain its effectiveness.
Conclusion
Trimming your dog’s nails with a grinder can be a stress-free and safe alternative to traditional clippers. With patience, positive reinforcement, and a gentle touch, you can help your furry friend maintain healthy and comfortable paws. Remember to take your time, be cautious not to overheat the nails, and prioritize your dog’s comfort throughout the process. With practice, both you and your dog will become more comfortable with this nail-trimming method, ensuring paw-fect results every time!
Buy a Nail Grinder today